How can I show or hide automatic cruxes?
Automatic cruxes are calculated for every route. They appear as yellow lines on your route and are explained by symbols. You can show or hide these symbols as follows so the map stays easy to read.
Automatic detection of potential cruxes helps you draw routes precisely and highlights sections that need extra focus.
Automatic cruxes are calculated for every route. They appear as yellow lines on your route and are explained by symbols. You can show or hide these symbols as follows so the map stays easy to read.
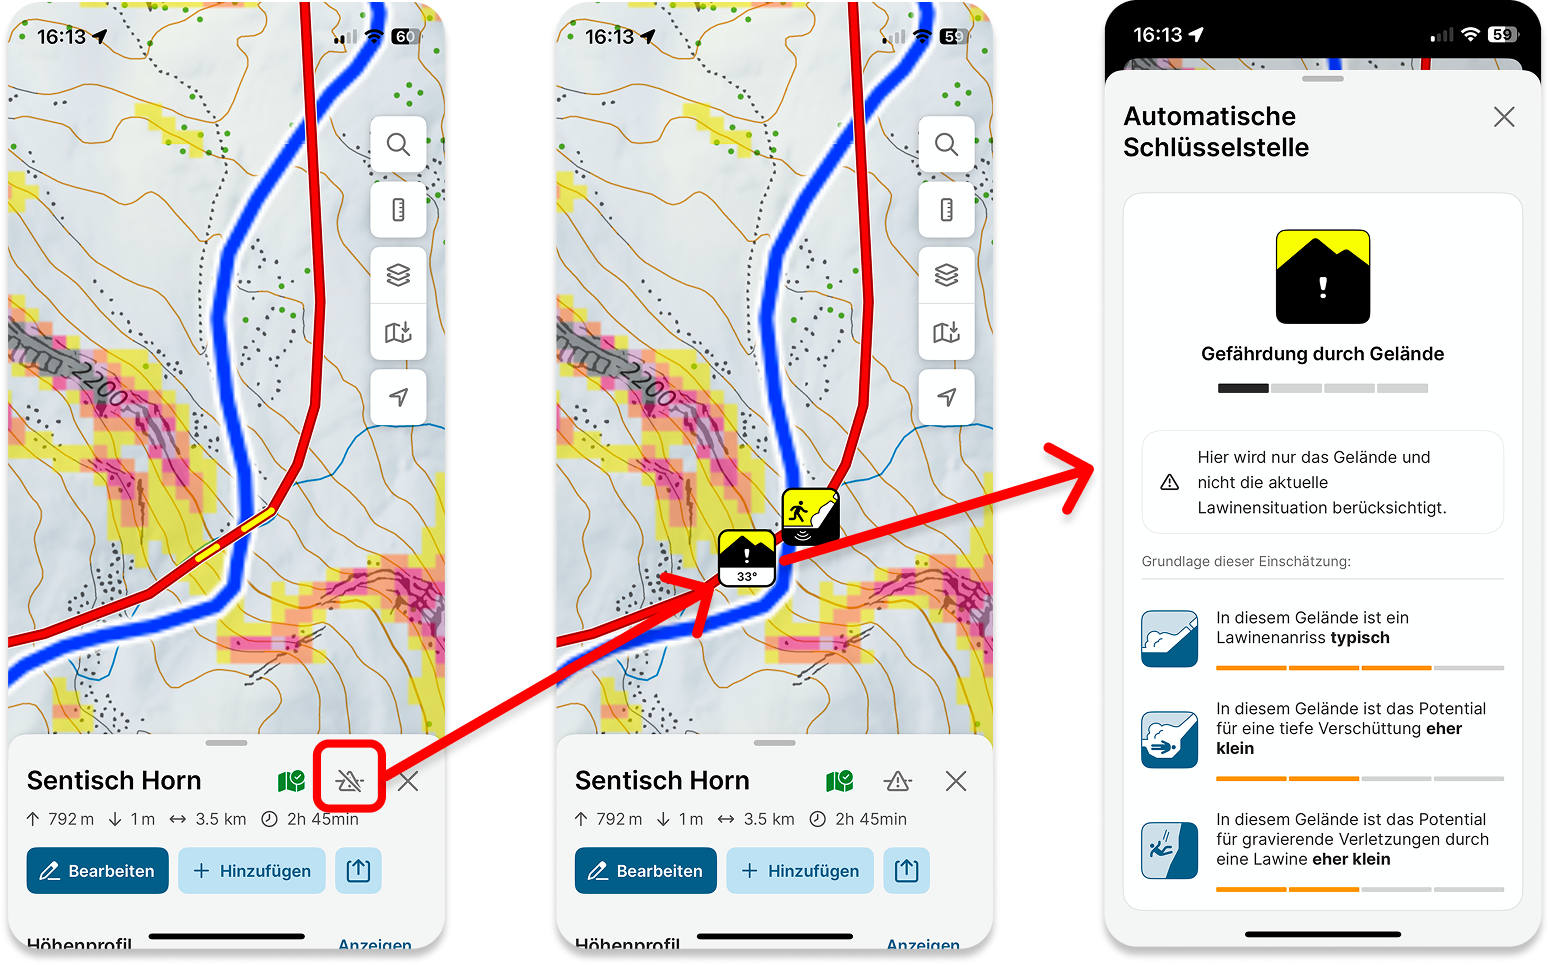
The symbols on the cruxes explain the terrain-related hazard. These sections should be examined closely during planning and need special attention during assessment.

The more exclamation marks, the more unfavorable the avalanche terrain and the higher the hazard.
Sections with !!! are pronounced avalanche terrain and require a favorable avalanche situation.
A red background additionally marks the upper edge of the avalanche-terrain hazard scale.

The number shows the slope angle of the steepest section within the highlighted segment.

Points to a hazard from remote triggering and needs special attention.

Indicates extreme terrain with fall hazard (> 50° slope).
Clicking a marked crux opens a dialog showing which factors were used for the assessment. This helps you judge the spot. The following factors matter:
Height
Slope angle
Aspect
Avalanche terrain hazard: Shows the calculated hazard potential.
Terrain potential for triggering: Shows the danger from fractures or remote triggering.
Consequences: Shows how high the fall or burial risk is.